Shhhh, this is a gift for a friend I travel with a fair amount. She loves yellow which is how I chose my color combo.
For those times when you travel and you have a hot iron, or curling iron you - need to pack up at the last minute here's a little case you can make. Mine is easy to make, you can cut it out and sew in and hour or less.I remember years ago ( like 20-hahah) people would take pot holders , fold them over and sew the 2 sides, it went over the curling iron problem solved. You could still do that. I went a little further though and created this model.
First you need to gather your supplies
outside fabric, Lining fabric, insul-bright for the heat resistant layer,trim color for pocket and iron on pellon like style 101 medium weight shape flex, a button for the closure and about 10 inches of cording to make trim. You could also use rick rack or leave this off completely. Next you will cut 4 layers 10 x 13.5 . 1 each of lining, pellon, insul-bright, and fashion fabric.


You will also cut out two strips 2" x 9" of the lining fabric for trim on the pocket, a square of 8x8" for the pocket, and lastly 15 "x 1" piece of fashion fabric to make button loop

Take your fashion fabric and iron the pellon to the back of it, following the directions of the pellon you use.
Next take the insul-bright and baste to the lining fabric. I use the new clips available instead of pins to hold the layers together. I chose not to use a walking foot because its not really that thick, and find my machine handles this sewing smoothly without use of the walking foot.
Next your going to make the edge trim using the cording and the 2 strips of of lining (2 x 9). Use the zipper foot it makes it easy. fold the strip in half and place the cording in the middle, the using the zipper foot sew up against the cording. I leave the cording long, and fold the second piece about 1/2 inch down from the end of the first one. cutting them apart after sewing. I then sew these pieces to 2 sides of the 8" square. so the meet on one corner. I then fold the square in half to make a triangle, and sew one side closed, and the second side I leave a couple inches open to turn it inside out. (you could use rick rack or other trim here if you chose).

I then attach the triangle to the fashion fabric on the long side centering it roughly. To finish the pocket I sew the bottom of the triangle to the center point. you will have one open end of the triangle towards the top side. sorry I don't have more pictures of this part. I then took the long strip of one inch fashion fabric, fold it in half, and both of the edges in to make a narrow strip sew down each side. Figure out where you would like the button to go on your pocket. then take the strip you made and figure out the length you will need to make a button loop. you will place this on the back side of the top of the holder.

I tack in place before attaching the lining. Then sew the lining to the fashion fabric at the top only, making sure to make the button loop have access to the outside. see photo to the right.
Press as you go along.


Next fold the tube in half and sew the long edge all the way from the lining through the fashion fabric, and finishing the end of the tube. Trim the bulk down, on the seam with the insul- bright and lining then Turn the tube inside out through the lining end of the tube. press. Next fold the ends of the lining in, and sew it shut. then push the lining down into the fashion fabric. I had to use a knitting needle square up the points.

Attach the button. double checking placement with the loop, making sure to only sew through the pocket section not down to the fashion fabric. Here you can see the loop hanging down from the seem of the lining and fashion fabric.
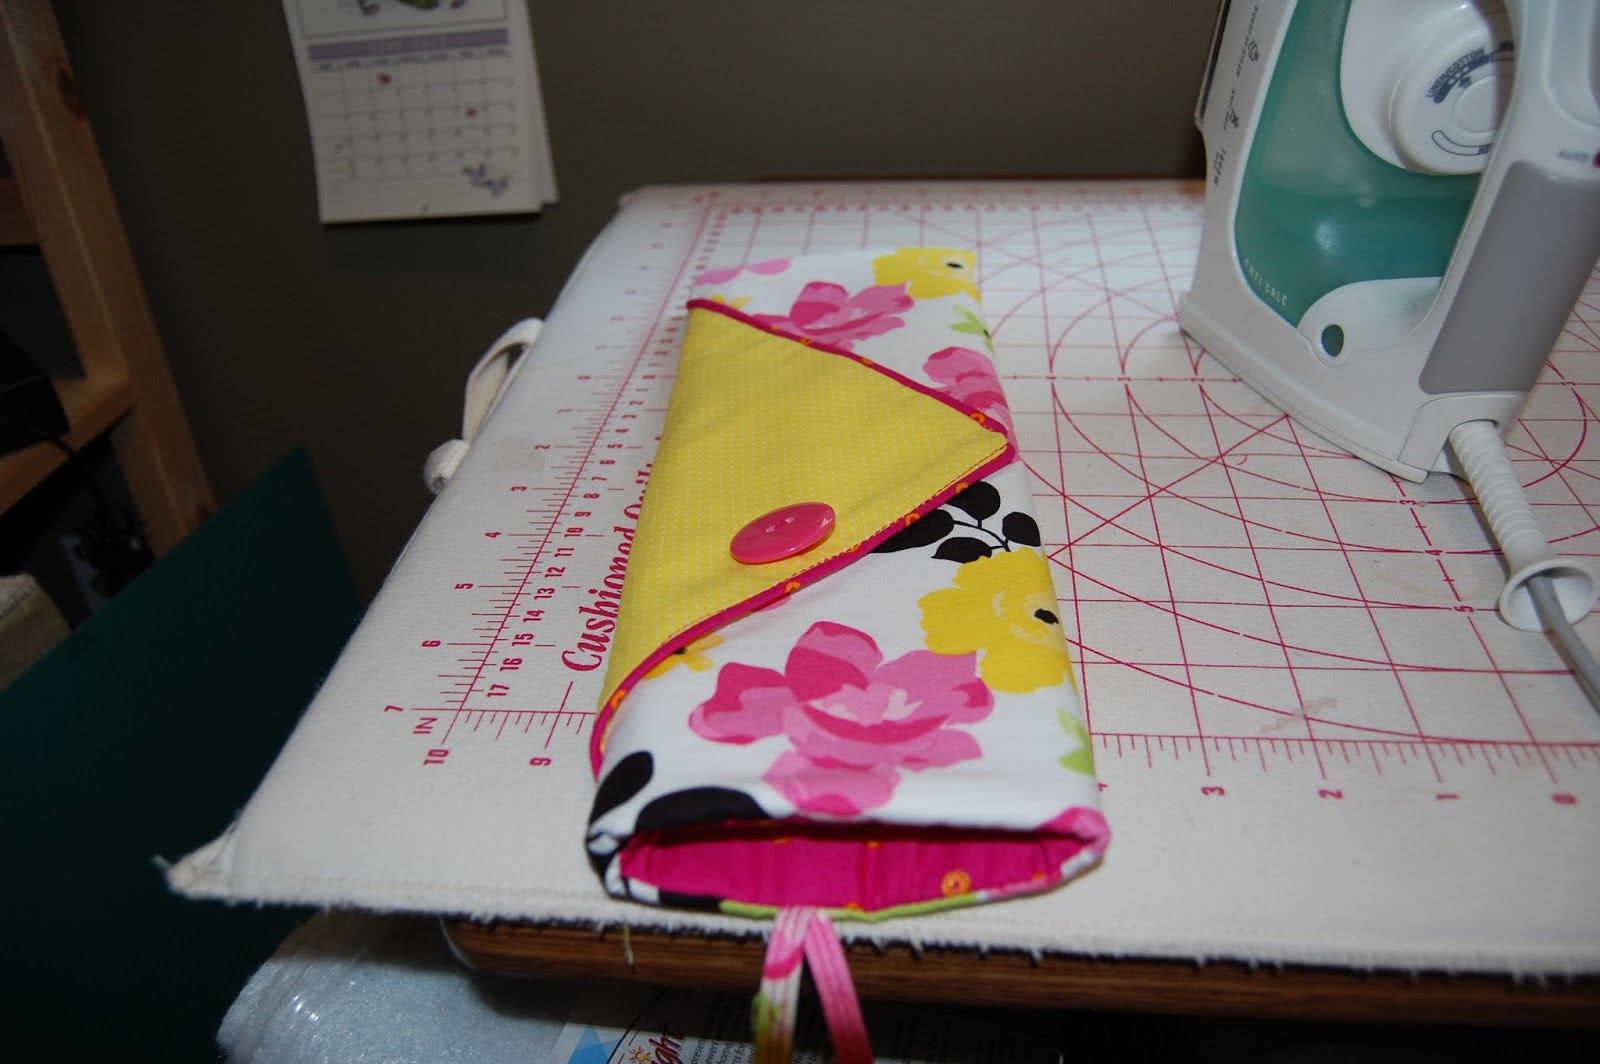
Below you can see the finished pocket empty.
to the right you can see it with the hot iron inside, and the cord wrapped and placed in the pocket, with the button loop closure.
This is a great item for traveling you no longer have to wait for the hot iron or curling iron to cool down to pack it. Since it always seems like the last thing you do is your hair and make up before leaving, its always and afterthought to pick up that cooling hot iron. Hope you this was helpful for you. I don't right many tutorials.
 Mother's Day was lovely with a call from my daughter. Then Hubs and I ran down to Apex to pick out a bottle of wine for him to take to a meeting. Of course this involved tasting their various wines. We really liked their Sauvignon Blanc, and then found several of their Reds are quite delicious as well.